Mostrando postagens com marcador powershell. Mostrar todas as postagens

Creating VMware Snapshots with PowerCLI

This is - Getting started with PowerShell and VMware vSphere - Part 1


Creating a snapshot, is a trivial and needed task most of the time. It is a very good idea to have it prior some changes in a virtual host.

    To create it, the virtual machine can be on or off. Also the snapshot will be created using that state. This might be important because if you roll back a running virtual machine to a snapshot where the virtual machine was stopped, the virtual machine will be stopped.     You will use the New-Snapshot cmdlet.

    When we create the snapshot you will need to give it a name... Also a good idea to provide a description. If the virtual machine is running, we can also elect to save the memory state as well with the –Memory parameter. Moreover, if the it has virtual tools installed, we can opt for a quiescent snapshot with –Quiesce

    This has the effect of saving the virtual disk in a consistent state. That is, the snapshot occurs without the operating system in the middle of trying to write something to disk. Personally, I remember to have less problems restoring a snapshot with –Quiesce, although there is a slight trade-off....  time it takes to create the snapshot. In fact, because a snapshot can take a few minutes to create, you may want to create it in the background on the VMware host using –RunAsycn.

2 ways I have tested:

  • New-Snapshot -VM MACHINE-NAME -Name 'NAME OF SNAP' -Description 'This is a test powershell snapshot' -Quiesce -Memory
  • Get-Vm MACHINE-NAME | New-Snapshot -Name "NAME OF SNAP" -Description 'This is a test powershell snapshot' -Quiesce -Memory


    Now, the beauty of scripting.... Naturally, if we can do it for one VM, we can do it for many :-)

Get-Vm MACHI* | new-snapshot -name "NAME OF SNAP" -Description "Created $(Get-Date) powershell" -Quiesce -Memory –RunAsync

    This will trigger a snapshot of all virtual machines which have names starting with MACHI*

Listing Snapshots

    To enumerate snapshots, just use Get-Snapshot. The snapshots are associated with the virtual machine, so you’ll need to specify one or we can use wildcards:

Get-Snapshot -vm MACHINE-NAME


Now that we have names, we can also get relevant information about the snap:

 Get-Snapshot -vm MACHINE-NAME -name SNAP-NAME | select *


Restoring from a Snapshot

To restore, we will use the Set-VM cmdlet. 
1st thing to do, assing the snap you want to a variable:

$snap = Get-Snapshot -vm MACHINE-NAME -name SNAP-NAME

Now we can easily use Set-VM to revert:

set-vm -VM MACHINE-NAME -Snapshot $snap -whatif


*Use -whatif to discover guess what? "What if" you ran that command what actions will take course. 

Removing Snapshots 

    Periodically you may want to clean up old snapshots using Remove-Snapshot. The easiest way is to get the snapshot or snapshots and pipe them to Remove-Snapshot. Some snapshots may have child snapshots so use –RemoveChildren to clean as well.

Get-Snapshot -name SNAP-NAME -VM MACHINE-NAME | remove-snapshot


    Now, imagine, we have multiple virtual machines with snapshots on that use the same name. We can use wildcards of course... be aware that this action would take some time to complete.... so let's running it asynchronously :-)

Get-Snapshot -name SNAP-NAME -vm * | remove-snapshot -RemoveChildren -RunAsync


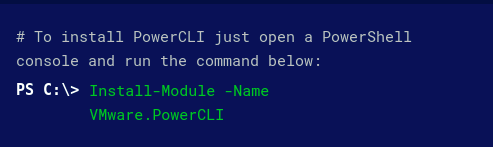
If you lost howto install click here


Next topic will be New-VM.


=======================================================================

"Do you already know my Linux training !?" Available in portuguese only.


"Você já conhece meu treimanento de linux!?"

Neste treinamento vamos abordar de forma simples, rápida e sem “enrolação”  como instalar o Linux CentOS 8 utilizando o VirtualBox e a nuvem da Amazon AWS do zero.


Getting started with PowerShell and VMware vSphere


VMware provides PowerCLI which is a set of modules for VMware vSphere. Now I bring to you old news.... you should know that PowerShell is a powerful scripting language.... Initially, PowerShell enabled to manage only Windows Workstation or Server, but since sometimes, a lot of vendors make their own modules to manage their solutions (such as Veeam, VMware and so on....). PowerShell is available on Linux as well.

Install or update PowerCLI

Very simple instalation... just install the module and go:

To install PowerCli from the PowerShell gallery you need Internet Access. Then run:

Install-Module -Name VMware.PowerCLI 


If you have already installed PowerCLI from the PowerShell gallery, you can run the following command:

Update-Module -Name VMware.PowerCLI


When PowerCLI is instalation is over, you can run: You can see that 922 cmdlet exists for VMware vSphere. That’s a lot!


Get-Command -module *VMware* | measure


Attention:
You need PowerShell v5 at least. If you are not using Windows 10 or Windows Server 2016, you can install the latest 
Windows Management Framework.


Connect to VMware vCenter


To manage VMware vSphere you have to connect to VMware vCenter. First, run a Get-Credential to store in variable credentials to connect to vCenter. Then run the following command:

Connect-VIServer -Server <vCenter FQDN> -Credential <Credential variable>


$admin_credential = Get-Credential
Connect-VIServer -Server your_server.you-domain.com -Credential $admin_credential


Also you can run for example:

Get-VM |ft Name, Guest, VMHost, PowerState


Of course you can combine versatilitie of powershell with 911  cmdlet exists for VMware vSphere to do a lot of things....

:-)


Query BitLocker status on remote machines

    This PowerShell script will remotely query each machines found in the specified answer file (using manage-bde.exe) to determine if BitLocker protection is ON or OFF.  Results will be saved to a CSV file. Very useful trick if you not have a specialized tool for. Just change the necessary variables and run...

    This is a very easy and simple script to use across your environment using manage-bde command line tool.

* You need to run as Admin 

# bitlocker status
$TextFilePath = Read-Host "What is the path to the text file?"
If (Test-Path $TextFilePath){
    $ComputersArray = Get-Content $TextFilePath
    $ComputerStatusCol = @()
ForEach ($Computer in $ComputersArray) {
        If (Test-Connection $Computer -Count 1){
            $ComputerStatus = manage-bde -status -cn "$Computer" 
            $ComputerStatusCol += $ComputerStatus
        } Else {
            Write-Host("$Computer appears to be offline.")
        }
    }
    $ComputerStatusCol | Out-File -filepath "c:\utils\Bitlocker-Status.txt" -append -force
Else {
    Write-Error "The text file was not found, check the path."
}


Visit my Powershell GitHub repository and contribute if you want... :-)
look for query_bitLocker.ps1

You need to insert the local path for a answer file with machines name to scan. After run on all machines, script will write data to a Out-File.  If you want to append data to this file instead of cleanning every time, do not forget to use -append -force


How to use it??


Liked !? Leave your comment !!

Do you know my linux Essentials course??

Disclaimer
    The sample scripts are not supported under any Microsoft standard support program, service or even by me. The sample scripts are provided AS IS without warranty of any kind. Use on your own risk.

(fim) Horário de Verão 2019.


O horário de verão foi inicialmente adotado para aproveitar a iluminação natural no fim da tarde, quando o consumo de energia "era" mais alto. Porém na atualmente isto deixou de ser relevante.

O governo determinou que este ano não haverá horário de verão.

Sendo assim, os relógios não serão adiantados em 1 hora conforme ocorreu ano passado (2018) e nos últimos 34 anos.

Bom para alguns, nem tão bom assim para outros, mas para os administradores de TI esse tipo de alteração sempre gera uma certa preocupação...
Ocorre que nos sistemas operacionais (neste caso em específico microsoft windows) já estão pré-configurados para adiantarem automaticamente seus relógios devido aos ciclos anteriores de atualização.


Para alterarmos isso, será necessário atualiza-los com updates da Microsoft que removem a configuração de horário de verão.

Atenção 1:

A Microsoft em seu update de julho-2019 incluiu a desativação do horário de verão.

Atualização: kb4507704
Versão suportada: Windows Server 2008, 2008 R2, 2012, 2012 R2, Windows 7, 8, 8.1
Download em: https://www.catalog.update.microsoft.com/Search.aspx?q=4507704

Atualização: kb4507459
Versão do Sistema Operacional: Windows Server 2016, Windows 10
Download em: https://www.catalog.update.microsoft.com/Search.aspx?q=4507459


Atenção 2:

  1. Caso os hosts estejam desatualizados a há muito tempo pode ser que ainda tenham a configuração de 2017/2018 e a alteração ocorrerá dia 20 de Outubro ao invés de 3 de Novembro.
  2. As atualizações do Windows Server 2012 R2 e 8.1 não exigem reinicialização. Para as atualizações do Windows 10 e Server 2016 exigem a reinicialização do sistema.

Dica para atualização em massa.


Caso você não tenha um SCCM ou um WSUS ou qualquer outra ferramenta de gerenciamento de atualizações, você pode utilizar o Power Shell para isso! Veja como aqui!


Windows Update with PowerShell


Para quem não possui por exemplo um SCCM, um WSUS ou algum outro serviço de entrega/instalação e gerenciamento de updates disponível... Saiba não é preciso fazer na unha!
Utilize Powershell e automatize muito esta atividade....

Agradeça Michal Gajda por isso. Criador do módulo PSWindowsUpdate. Este módulo gerencia o windows update em computadores com PS v2.0 ou superior. Este módulo ainda habilita a possibilidade de gerenciarmos o processo de gerenciamento de updates remotamente.Este módulo é particularmente bacana para trabalharmos com servidores server core (que não possui GUI)


Procedimento de instalação:

No servidor em questão descompacte o modulo em:
c:\Windows\System32\WindowsPowerShell\v1.0\Modules


Após descompacta-lo, inicie um prompt PS elevado. Será necessário trocar a política de execução do PS para RemoteSigned. (isto é necessário para que scripts baixados da internet possam rodar localmente desde que sejam signed por um trusted publisher.)


Digite Set-ExecutionPolicy RemoteSigned e pressione Enter. Quando solicitado confirme conforme abaixo:


(Caso esteja rodando o PS v2.0 é necessário importar o módulo (versões superiores não é necessário). Para importar: Import-Module PSWindowsUpdate e pressione Enter)

Para identificar os possíveis comandos deste móduloGet-Command –module PSWindowsUpdate e pressione Enter.


Agora vamos registrar o servidor de update da Microsoft para que ele possa ser usado.
Add-WUServiceManager -ServiceID 7971f918-a847-4430-9279-4a52d1efe18d e pressione Enter. Quando necessário confirme o registro conforme abaixo:


Iniciando o update
Primeiramente é importante identificar quais updates estão faltando... Para isso com o comando abaixo vamos apenas lista-los. (aqui todos os tipos de updates serão listados)
Get-WUInstall –MicrosoftUpdate –ListOnly e pressione Enter. Pode demorar um pouco para termos a resposta....

Uma grande preocupação no momento da realização do update e do ciclo de gerenciamento de updates como um todo é que invariavelmente você terá que reiniciar a máquina, indisponibilizando-a para o negócio. Minha orientação é, crie janelas pré-definidas para este propósito. Levando isso em conta você poderia por exemplo automatizar todo o processo:
--> ATENÇÃO, perceba que com este comando você estará aceitando, baixando e instalando todos os updates necessários numa tacada só e o servidor será reiniciado automaticamente.

Get-WUInstall –MicrosoftUpdate –AcceptAll –AutoReboot e pressione Enter conforme abaixo:


Exemplo na prática:


  1. Listei os updates necessários;
  2. Fiz o download apenas da atualização;
  3. Quando listei novamente o update tinha o Status D (downloaded)
Agora para realizar a instalação é só repetir o comando sem a opção -downloadonly

Algumas opções legais:


--> DownloadOnly
Esta opção irá baixar os updates para a máquina sem os instalar. Posteriormente você poderá iniciar o processo de update novamente (que será bem mais rápido, sem download) e seguir com os updates já locais.
Ex:  Get-WUInstall –MicrosoftUpdate –AcceptAll –downloadonly

--> Critical updates / Security updates
A Microsoft disponibiliza alguns tipos de atualizações (Atualizações críticas, de definições, features packs, de segurança, service packs, tools, pacotes cumulativos, upgrades e dependendo podemos ainda atualizar drivers e firmwares). Por isso, pode ser importante determinar qual ou quais categorias se quer atualizar
 Ex:
Get-WUInstall -MicrosoftUpdate -AcceptAll -AutoReboot -Category @('Critical Updates', 'Security Updates')
Assim estaríamos instalando apenas as críticas e de segurança. 


--> Status de reboot pending
       Esta opção irá mostrar se a máquina esta com um reboot pendente:
 Ex:  Get-WUrebootStatus –ComputerName "nome_servidor"


Estou trabalhando na evolução deste procedimento que hoje é "local" para automatizá-lo de forma onde seja possível conectar-se a múltiplas instâncias (múltiplos servidores) e se execute a atualização simultânea, colete dados e envie o relatório com antes e depois...